
How to install the PLISSA mini pleated insect screen
PLISSA mini is a pleated (accordion) screen with a bottom track, in three versions: side-opening, side-opening 2-leaf and reversible. The bayonet system joins the profiles into a rigid frame; then level, screw and fine-tune.
In short The PLISSA mini pleated insect screen goes in in a few steps, with a drill, spirit level and screwdriver. This illustrated guide gives the steps, final checks and a PDF with QR code to print or open on your phone.
Before you start
Tools
- Drill with bits suited to the wall or frame
- Spirit level (or laser)
- Tape measure and pencil
- Screwdriver
People
2 people recommended (bottom track and long leaves)
Step by step
First: the top and bottom tracks (all versions)
1. Fix the tracks
Mark the position, level the top track and fix it respecting the 2.5 mm gap shown. Then lay the bottom track on the sill; with two leaves it can be cut into two equal pieces centred in the opening.
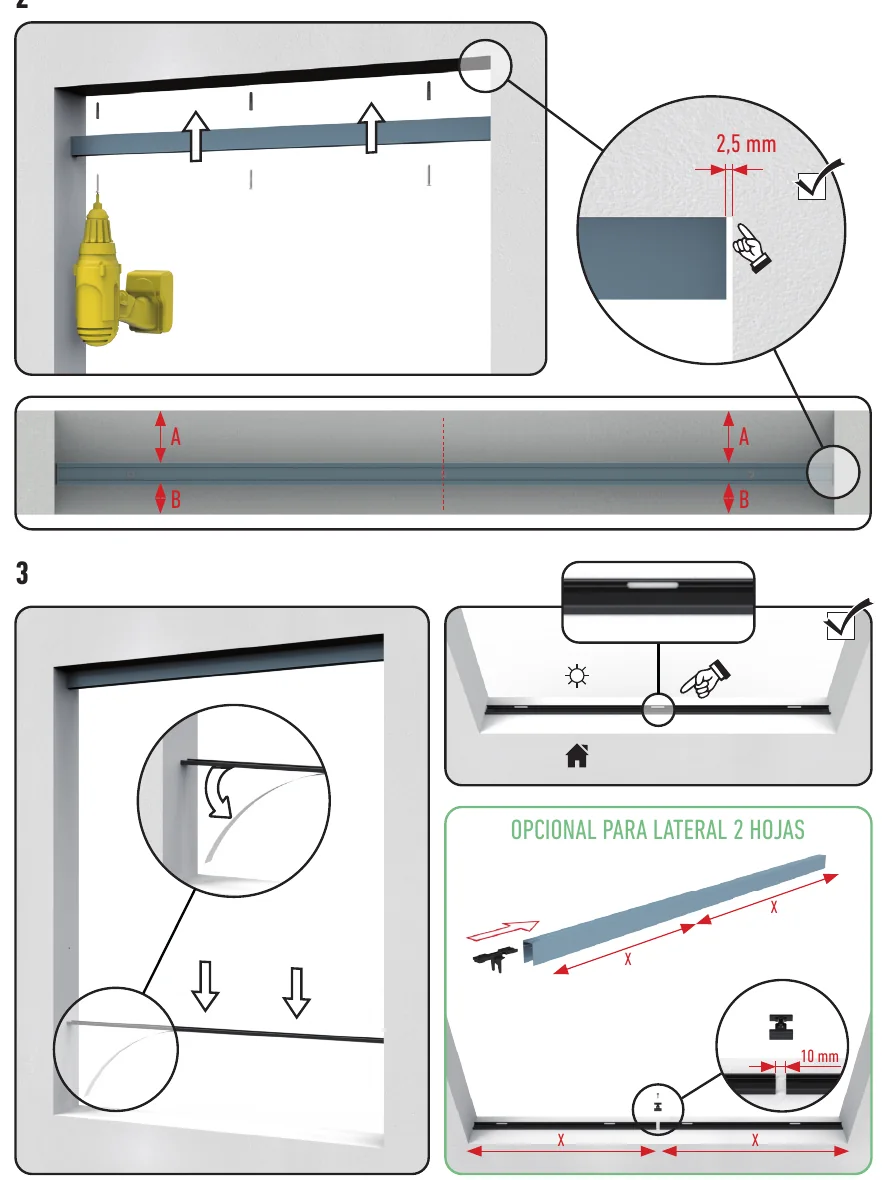
2. Prepare the profiles and fix the track
Follow figures 4 to 6 of the drawing: slide the closing profile into its track, seat the vertical profile in the bottom track (swinging it into the opening) and fix everything with the drill, always level.
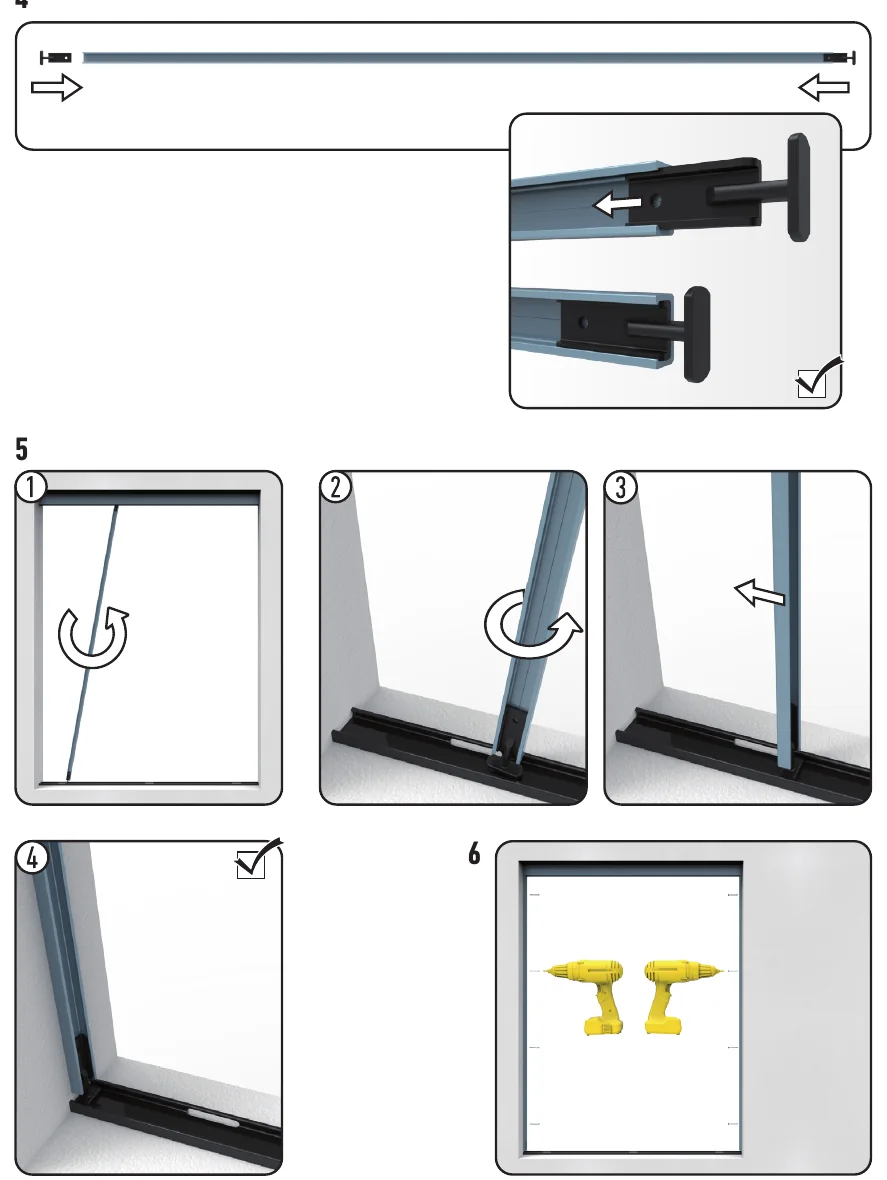
Side-opening version (1 leaf)
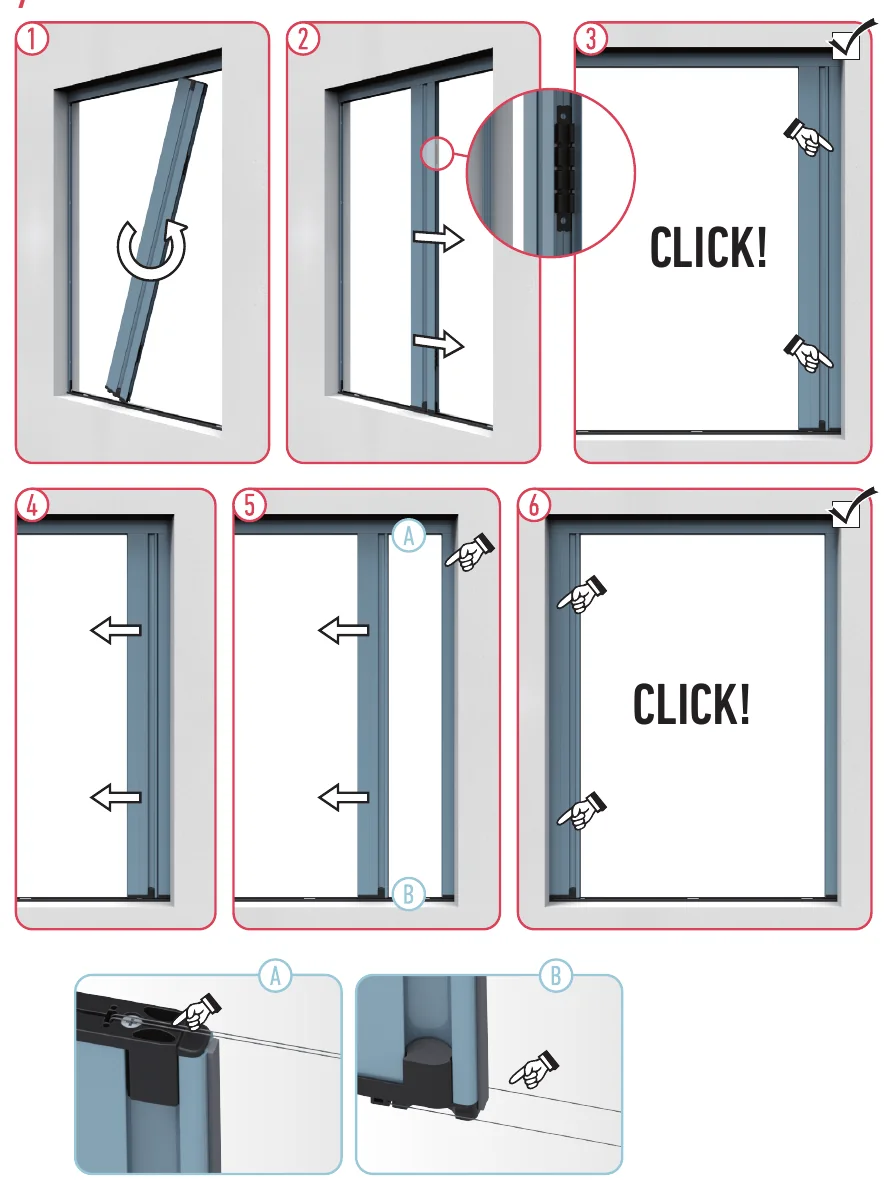
Fit the side profile
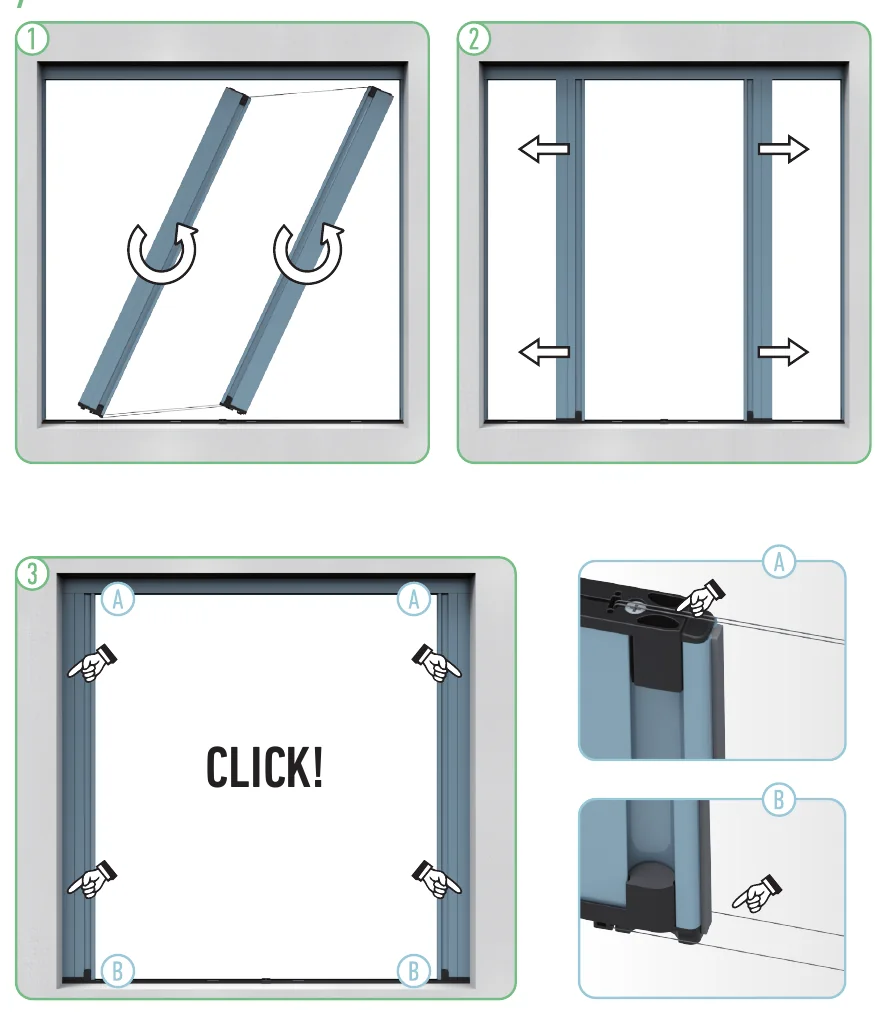
Swing the vertical profile into the opening, slide it between the tracks and snap it in: you hear a CLICK at both bayonet points. Repeat with the closing profile up to the final CLICK.
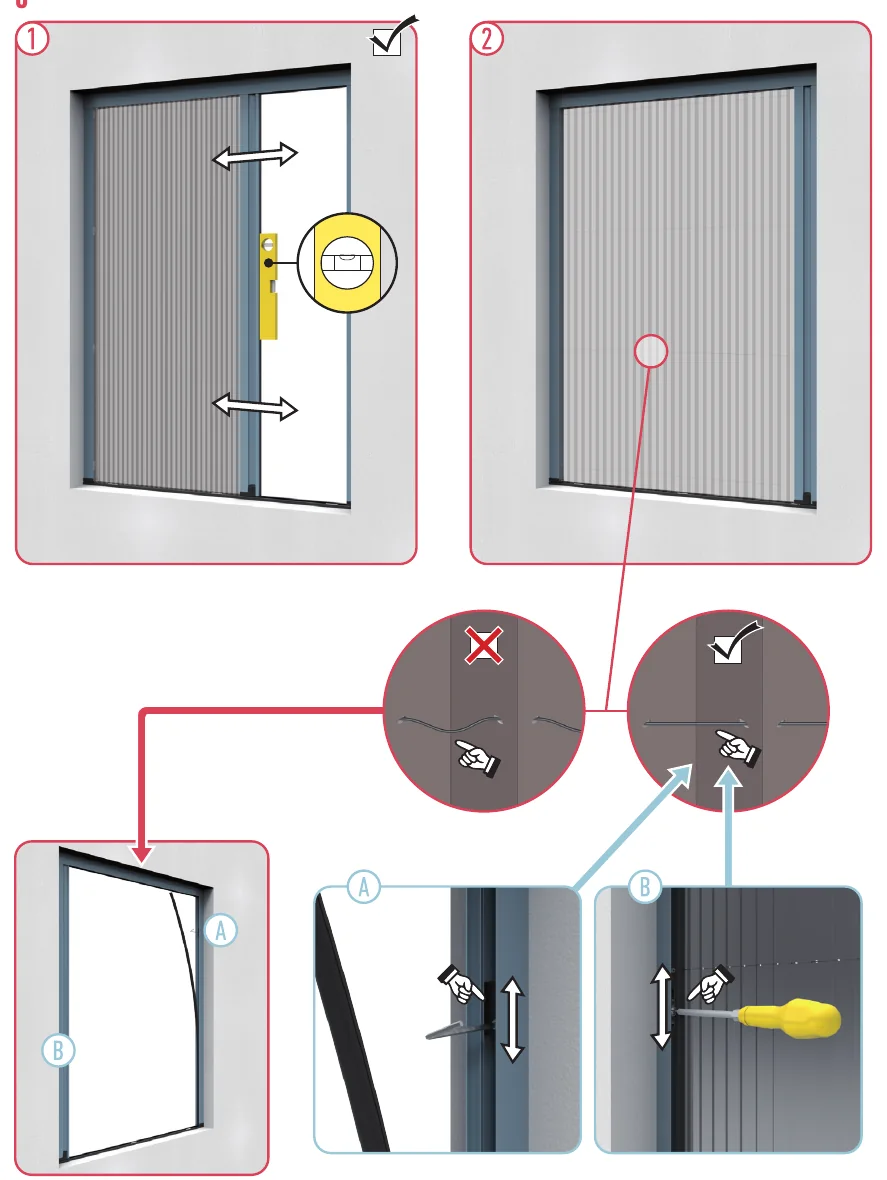
Level, screw and fine-tune
Check level, screw the profile and confirm the pleats are taut and aligned (cross = wrong, tick = right). Adjust with the screwdriver.
Side-opening 2-leaf version
Fit the two side profiles
Swing and slide each side profile to its side of the opening and snap the four corners (CLICK at points A and B).
Level, screw and centre the leaves
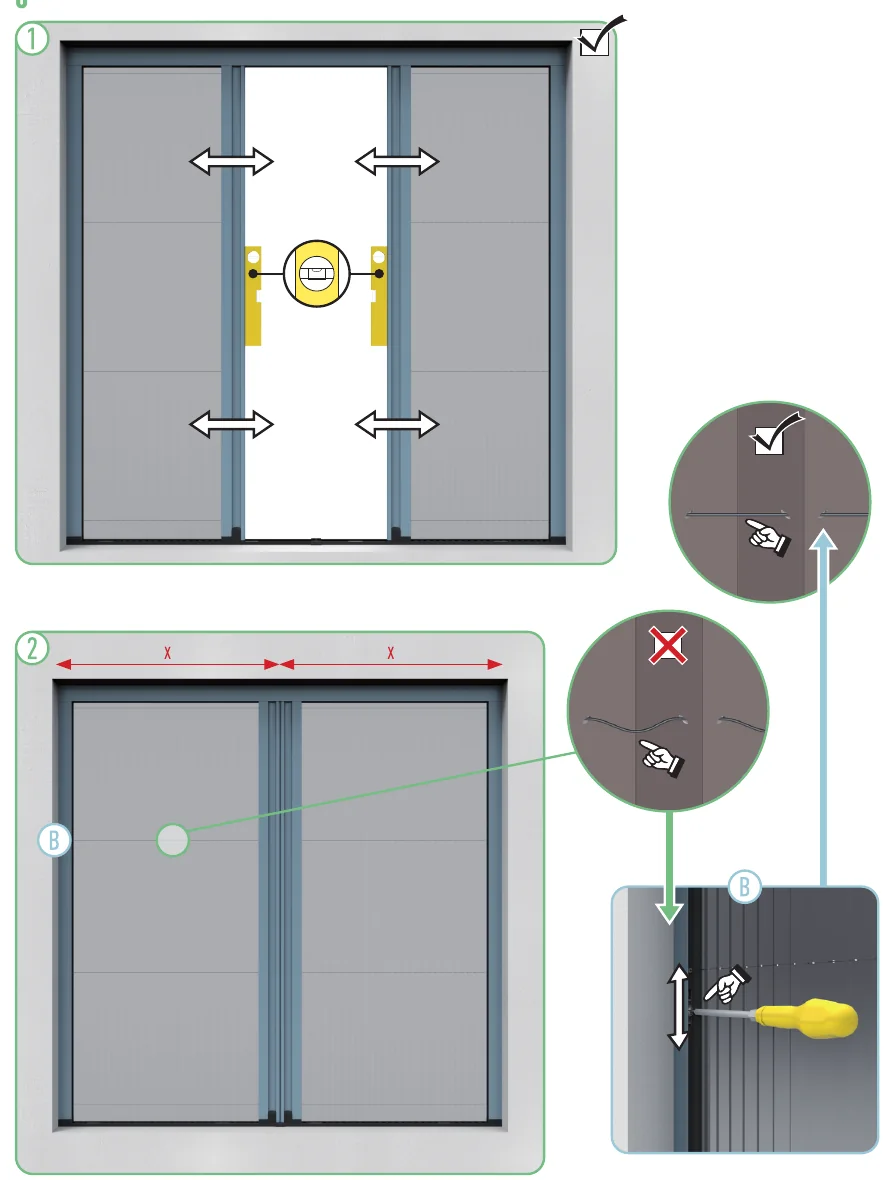
Level, screw and check the two leaves meet in the middle with equal widths (equal x). Adjust the pleats as for the side version.
Reversible version
Fit the double centre profile
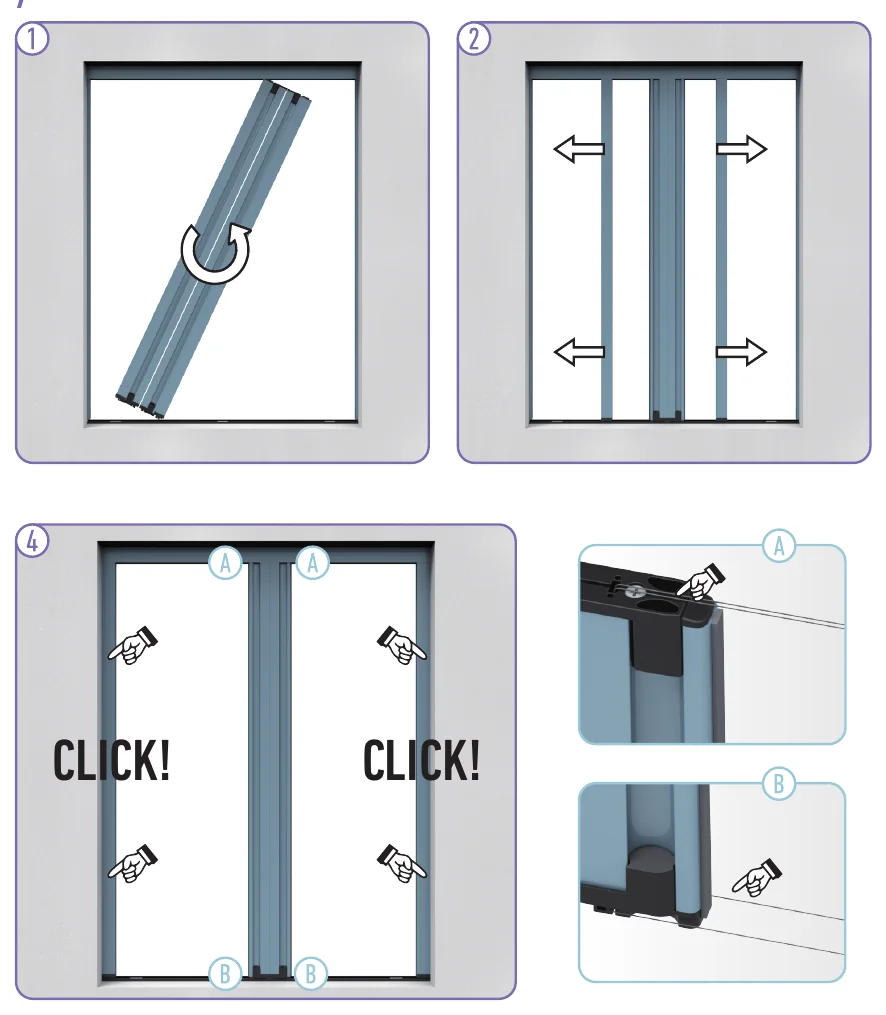
Swing the centre profile into the opening, spread the leaves and snap the four corners (CLICK).
Level, screw and fine-tune
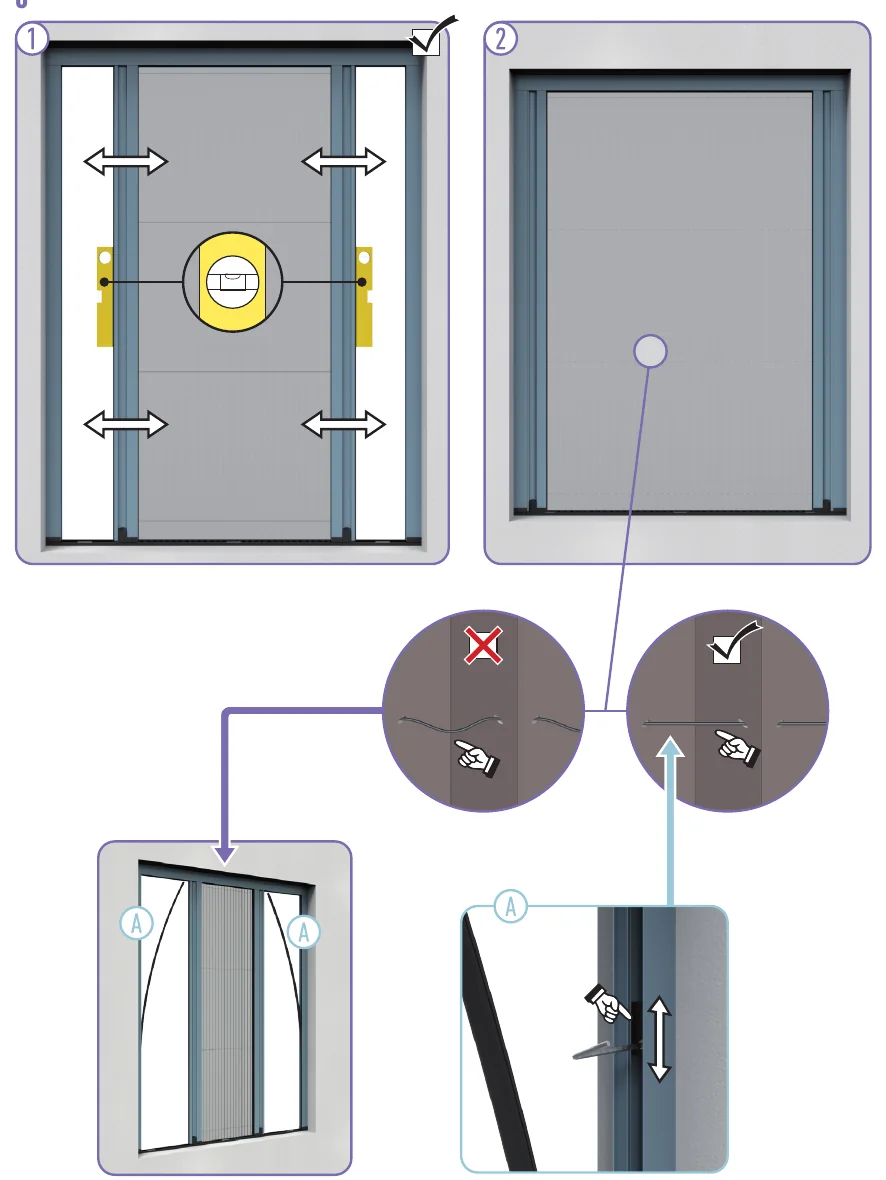
Level, screw the centre profile and check the pleats fold symmetrically; adjust until the leaves line up.
Final checks
- The pleats open and close smoothly and stop at any position.
- The closure sits flush against the profile, with no gaps.
- The bottom track is firm and visible (no trip risk).
Need a hand?
If something does not fit, do not force it: photograph the problem and send it to us. You can also read the measuring guide or the range page.
Measuring guide Range page: PLISSA mini Contact us
Illustrations based on the profile manufacturer’s assembly instructions.
Frequently asked questions
Which version: side, 2-leaf or reversible?
Side: a narrow opening or a door opening one way. 2-leaf: wide openings, opening on both sides. Reversible: the pleats fold to the centre, handy for large balcony doors.
Does the pleated screen have a track on the floor?
Yes, a slim bottom track. Point it out to anyone walking through, especially on a balcony door.